
Precision Casting Process FAQs - Metal Pouring
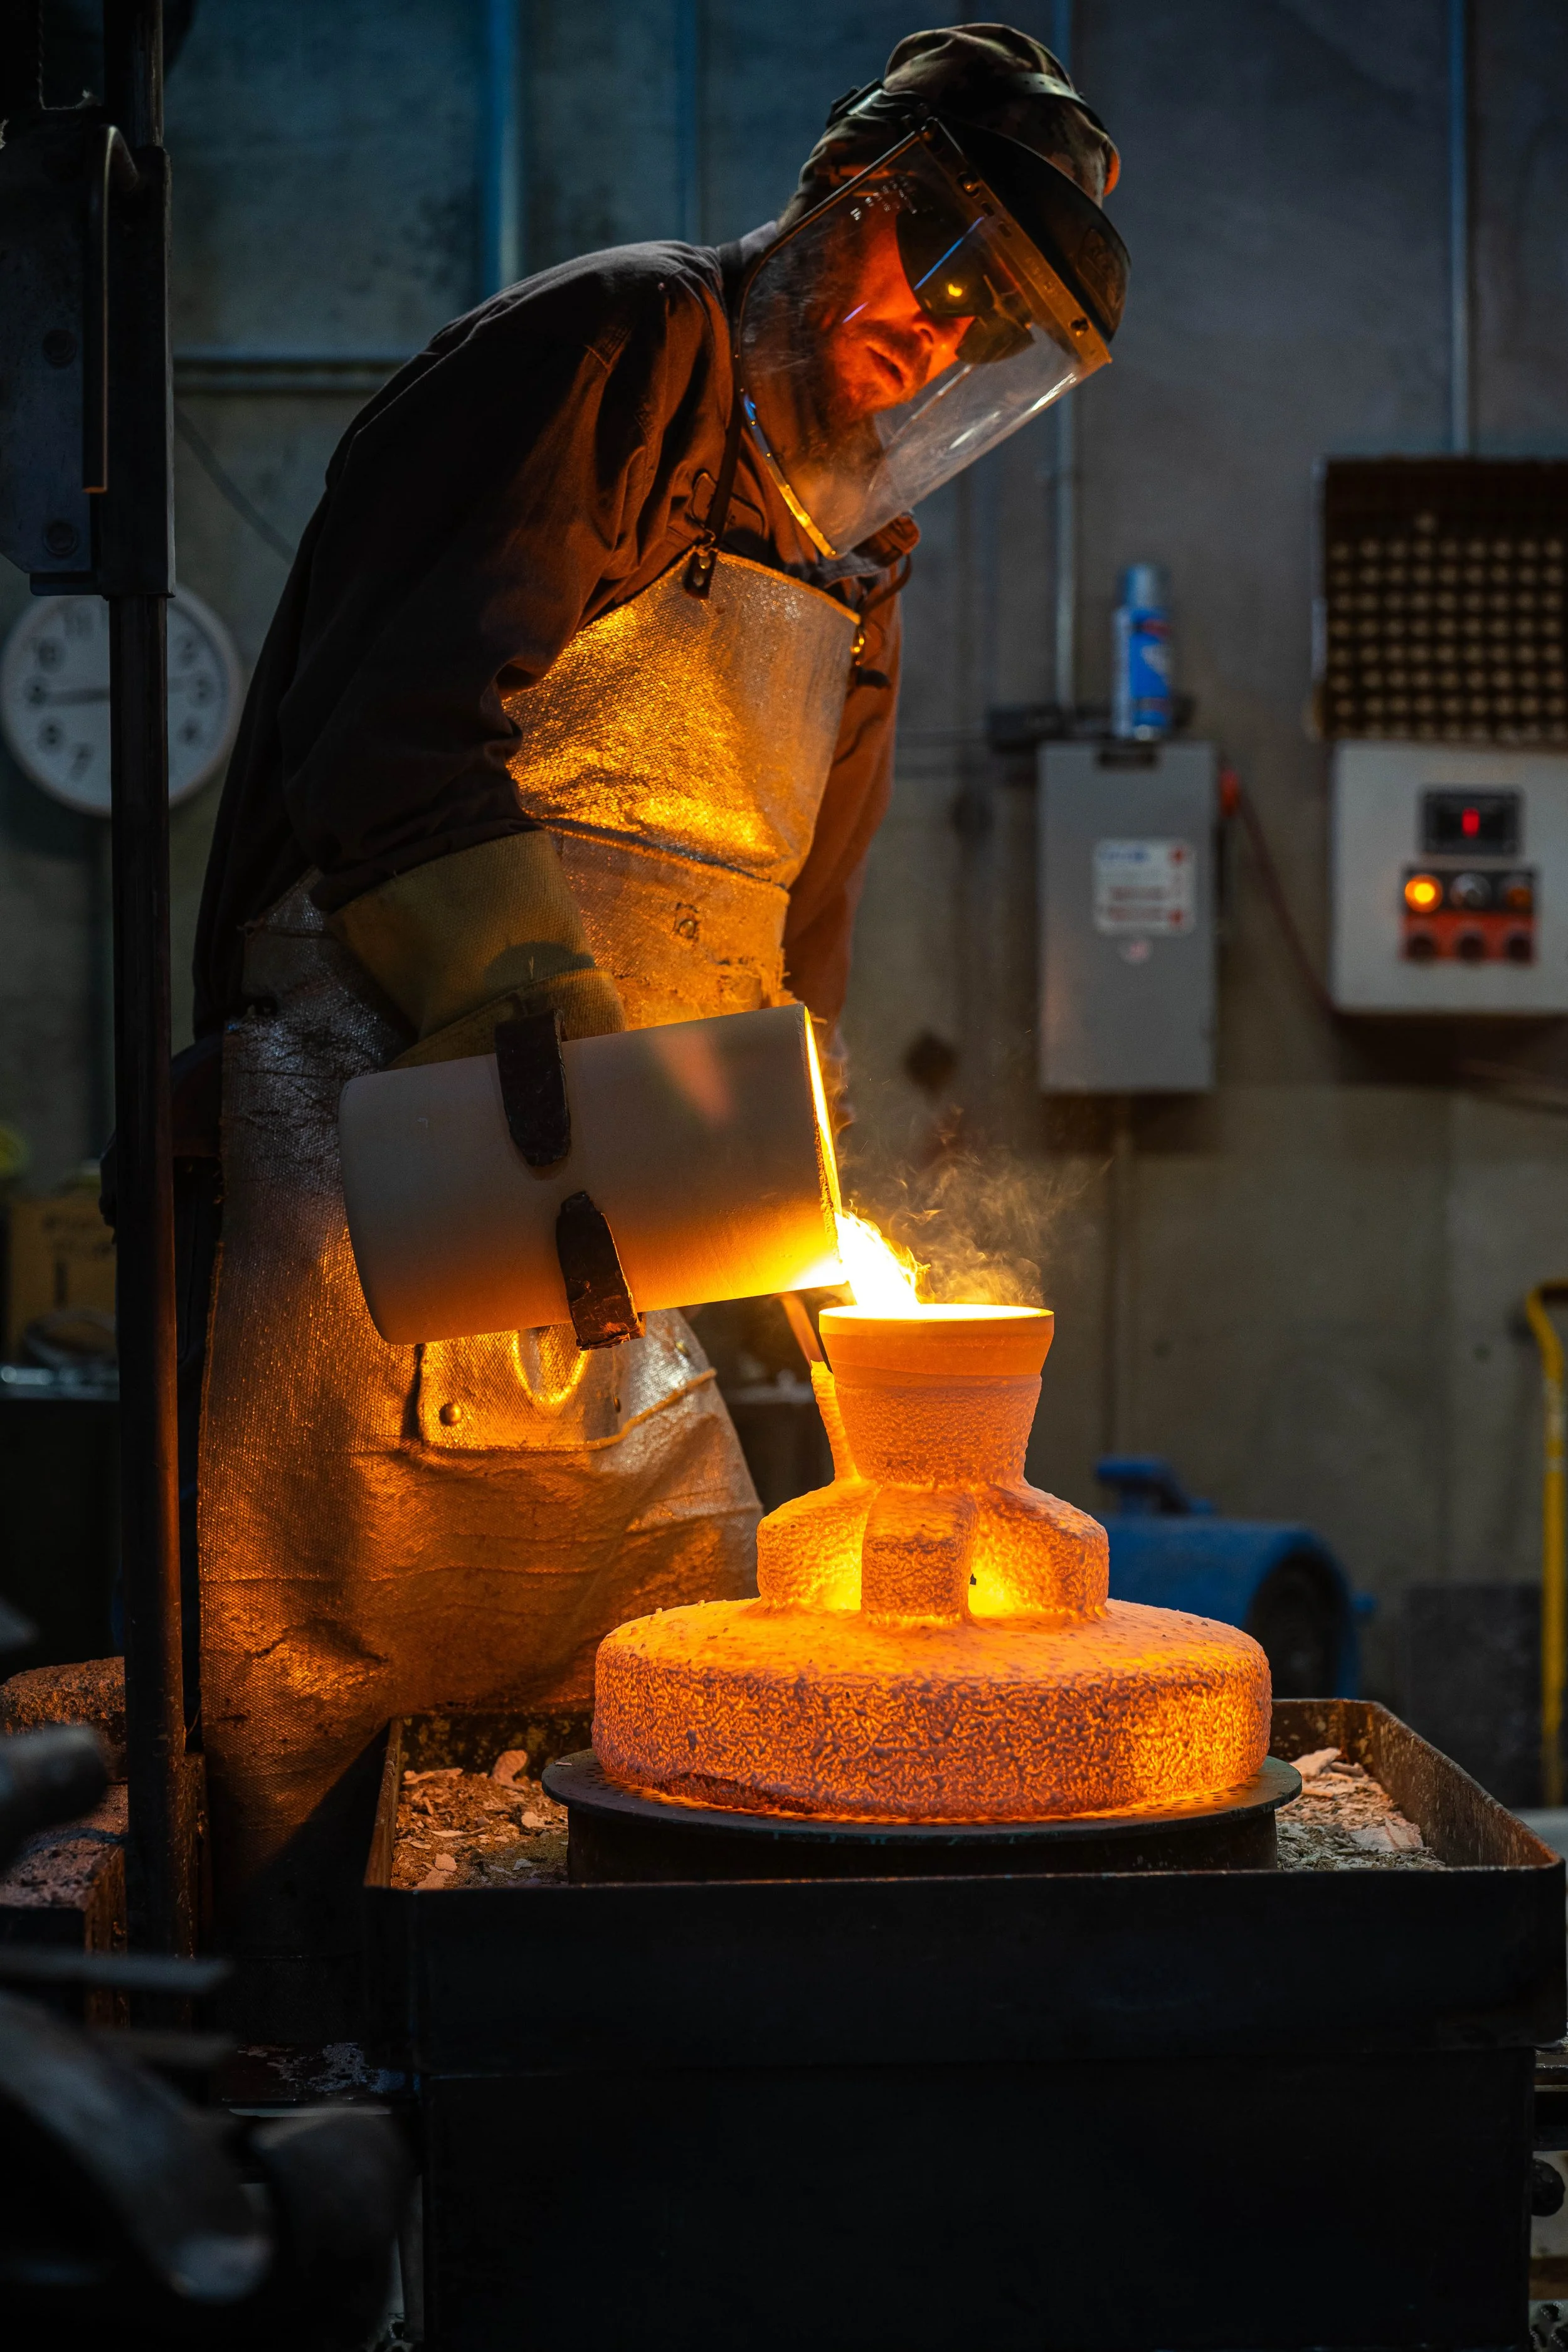
A foundry worker pouring molten metal into a recently heated ceramic shell.
Welcome back to our series on frequently asked questions about the casting process. In today's article, we're focusing on the metal pouring stage, which is a massive step toward a completed metal component. Before we get into pouring, let's quickly review the basic steps we've covered so far as a refresher.
The Process So Far:
Step 1: Tooling
Foundry engineers design "tooling" using CAD software. This design is a negative of your final part, which will be fabricated to replicate wax models of your part many times over. Previously, we related tooling to an ice cube tray; just like water will fill the cavities to produce ice cubes, tooling is used in the wax injection phase to create a 1:1 wax model of your part.
Step 2: Wax Injection
Tooling is placed into wax injection machines. The tooling holds the net shape of your part as the wax is injected into it. Foundry workers will make a 1:1 scale wax pattern for each component your production order calls for. In other words, if you need 1,000 valves produced, foundry workers will make at least 1,000 wax patterns of your part.
Each wax pattern will also be attached to a tree, serving as a flow path for molten metal later in the process. Trees also enable foundry workers to pour multiple components in one go, increasing production efficiency. "Gates" are also introduced into each wax pattern during this process. A gate serves as the entry point for metal into each part. They are designed to ensure an appropriate controlled flow of metal during the pouring stage and help prevent impurities and part failures (more on that in the main article).
Step 3: Ceramic Slurry & Shell Building
Wax patterns and associated trees are moved into the dipping room, where they undergo a series of dips and coating in ceramic material and subsequent drying periods. Wax patterns are dipped multiple times to form a strong ceramic shell, which will eventually be used as the medium for metal pouring.
Step 4: Dewaxing
Once ceramic shells are finished, foundry workers melt away wax patterns from the inside, typically with autoclave or flashfire systems. During this process, wax is reclaimed, where it can be recycled or reused in future projects. Heating during this step also helps cure (sinter) the ceramic shells.
That has us all caught up; let's get into metal pouring.
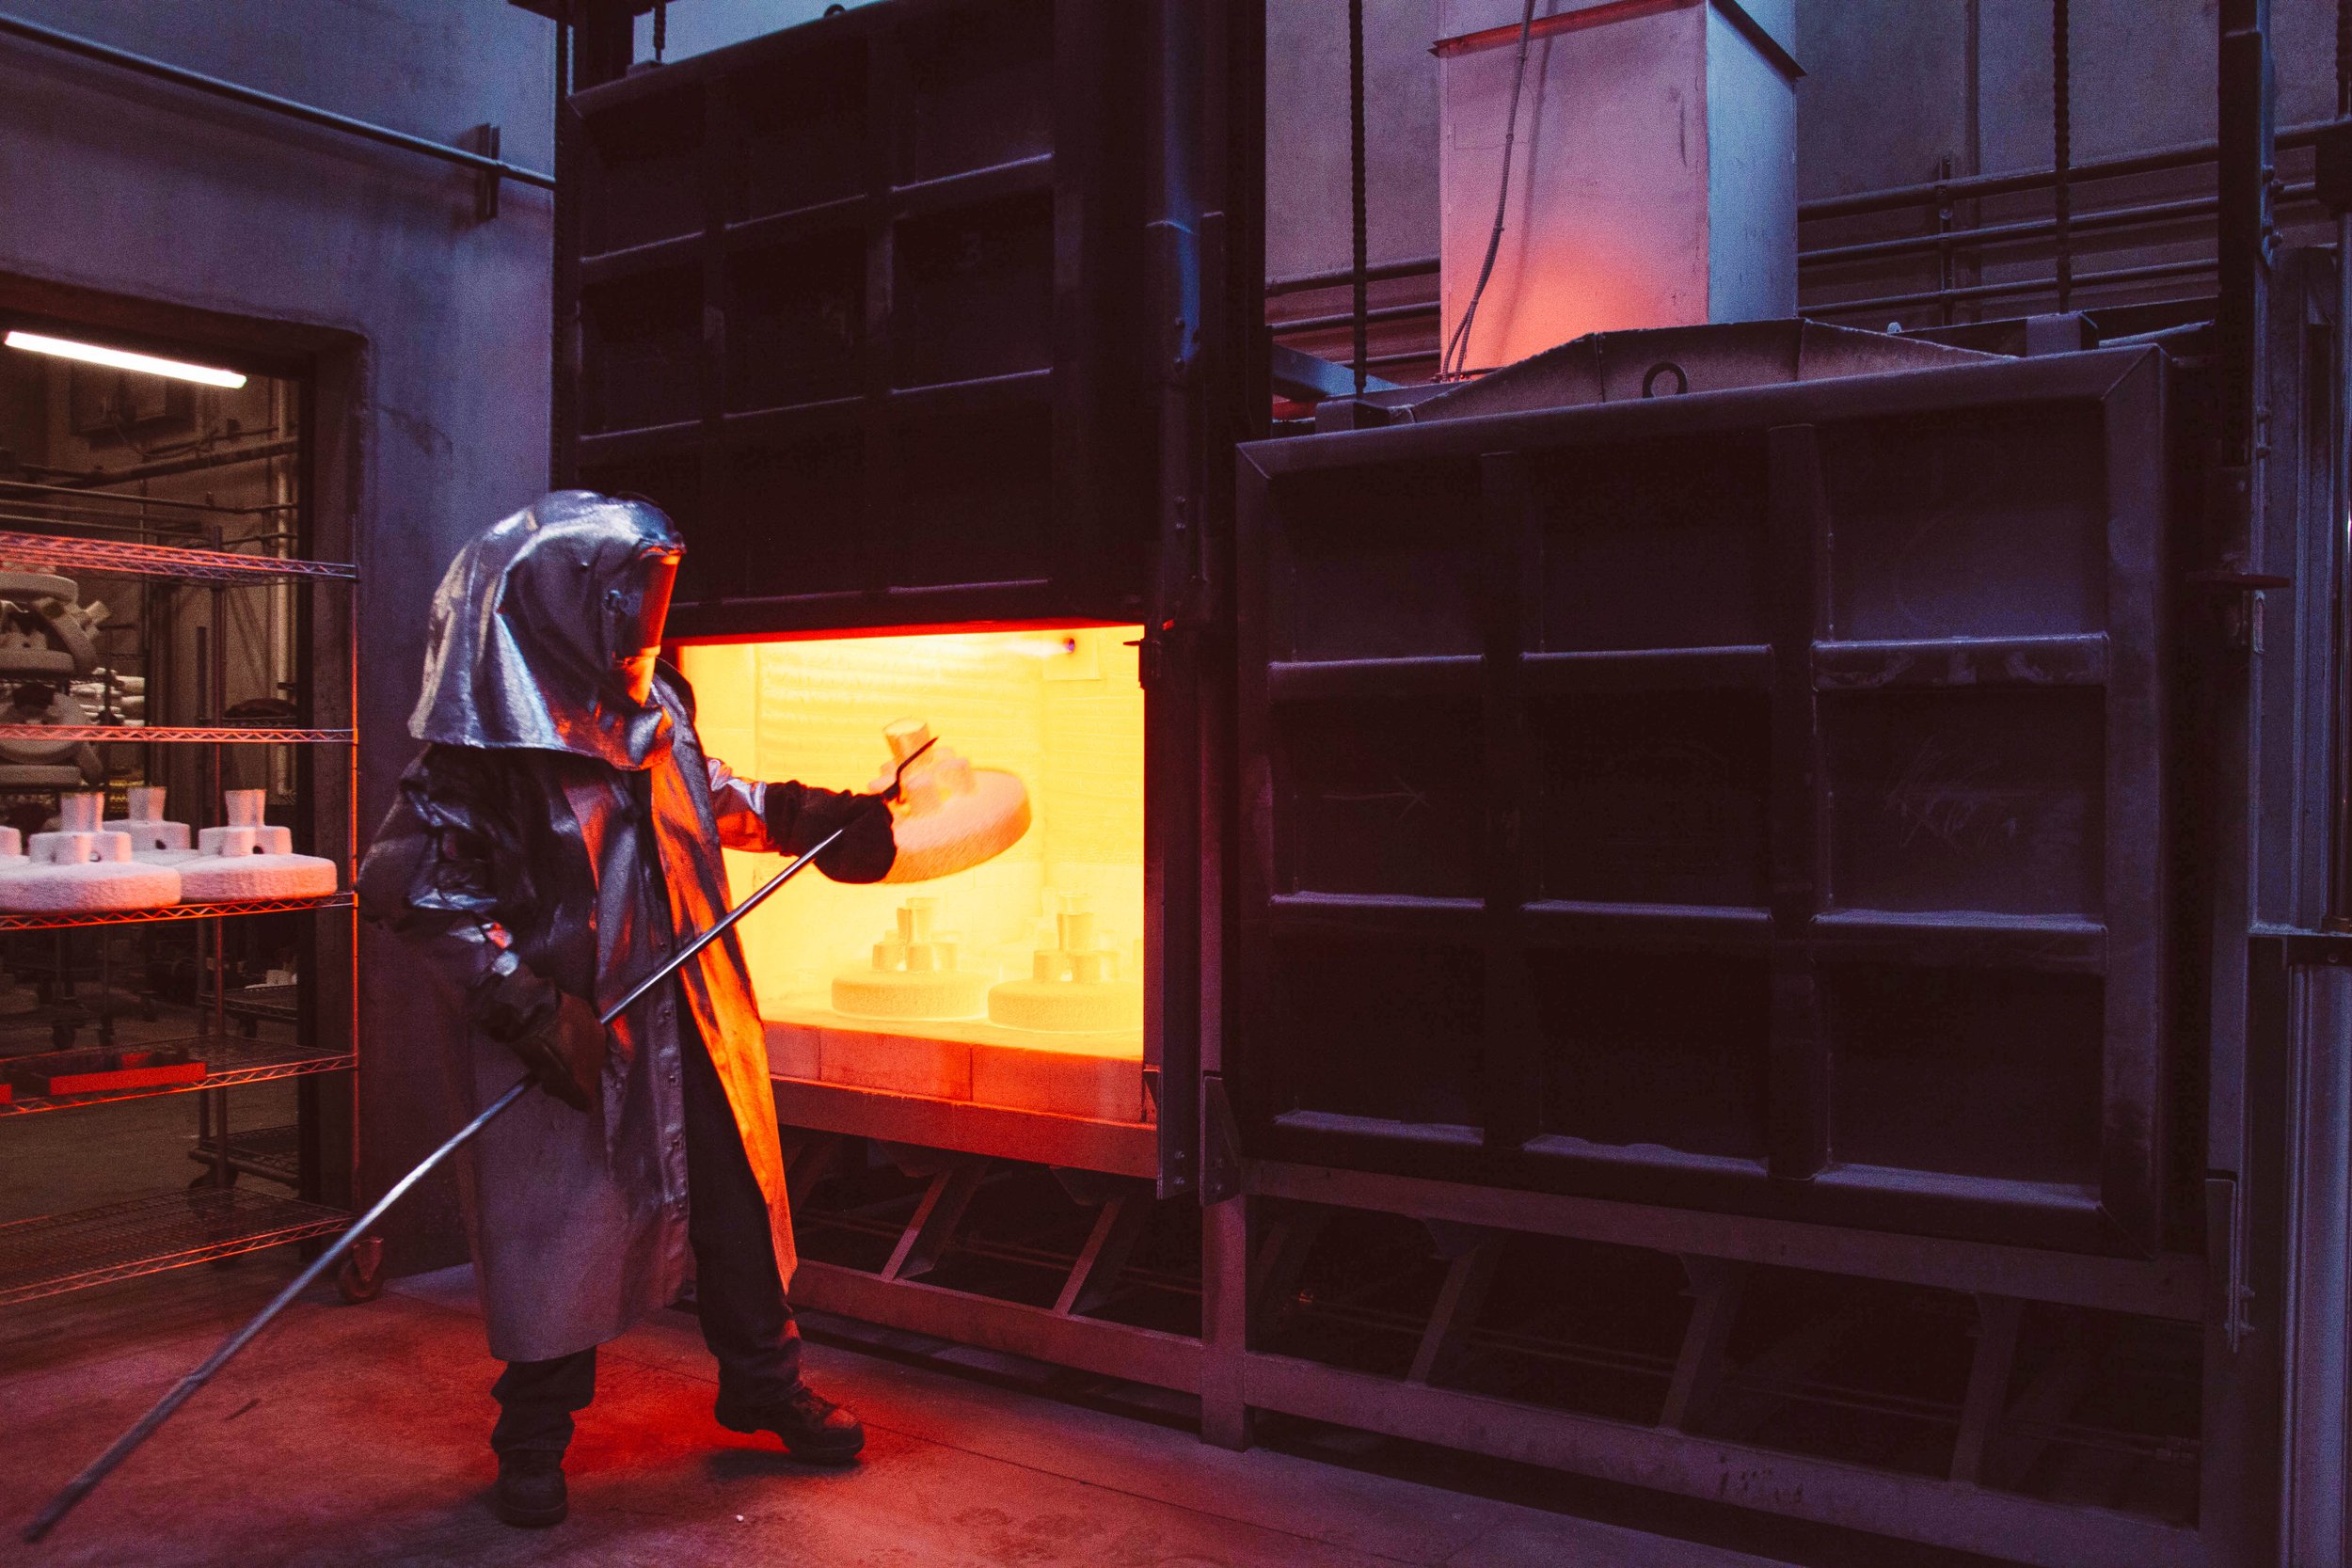
A foundry worker removes a superheated ceramic shell just before pouring.
What Happens During Metal Pouring?
First, foundry workers place ceramic shells into an industrial oven to superheat them before metal pouring (see image above).
This is done for several reasons:
Any residual wax, condensation, or material is burned away, so not to be included in the final product.
Heating the shell strengthens it even more for the upcoming pour.
Heated shells assist in consistent, controlled pouring throughout the part's geometry.
Heating ceramic shells prevents thermal shock from pouring molten metal. If pouring occurred at room temperature, shells would shatter, erode, or fail in other ways.
Superheating the ceramic shells allows for uniform cooling and prevents shunts or other failures.
While shells are superheated, foundry workers heat your chosen alloy to an optimal temperature for pouring. Once shells and alloys are at the appropriate temperature, shells are removed from the ovens and undergo metal pouring immediately.
Metal is poured at an appropriate speed to ensure consistent results and controlled cooling.
Following a cooldown period, parts are ready for shell removal and finishing work (the next steps of the process).
What Metals Can Be Poured in Precision Casting?
A variety of air-melt and vacuum-melt alloys are poured via investment casting.
Steel Alloys (carbon steel & tool steels)
Stainless Steel (300 series, 400 series, precipitation hardening, etc.)
Cobalt Base Alloys
Nickel Base Alloys
Super Alloys (Inconel, Stellite, Monel, etc.)
Copper Base Alloys (silicon bronze, aluminum bronze, etc.)
Cast Iron
Aluminum
Titanium
and more
What Temperature Are Ceramic Shells Heated to?
Temperature is dependent on the alloy being poured and ambient conditions within the foundry. Commonly, shells are heated to 1000-2000°F (550-1100°C).
What Temperature Are Metals Heated to?
Ingots are heated to their melting point, which varies by alloy.
What Happens if Pouring Temperatures Are Wrong?
In short, outright part failures or inconsistent quality. Here are a few notes:
- If shell temperatures are too high, the ceramic can crack, leading to shell inclusion in the final part, improper part geometries, inconsistent cooling, rough surface finishes, and more
- If metal temperatures are too high, this can cause shell cracks and failures. It also can create poor metallurgy, gas porosity, shrinkage, cavities, poor surface finish, and dimensional inaccuracy/failed parts.
-If shell temperatures are too low, Underheated shells are a leading cause of scrapped parts. They can lead to cold shunts and inconsistent cooling where the mold will not completely fill and the part will fail. It can also lead to thermal shock cracks which will cause dimensional failures or surface finish issues. Shells that are too cold can also lead to warping, distortion, and tears.
- If the metal temperature is too low, you'll likely experience an incomplete pour due to premature solidification. Among other failures, too low of a temperature can also lead to poor metallurgy, inclusion of ceramic into the final product, part inaccuracies, and overall part failure.
How do Gates & Trees Aid in Metal Pouring?
Gates and trees from the wax injection phase of the precision casting process, allow foundries to pour multiple parts at a time and help prevent imperfections and impurities from entering the parts. Here are some brief notes on both gates and trees.
Gates:
Guide molten metal from the pouring cup into individual part cavities.
Control solidification to prevent shrinkage defects.
Trap impurities (slag/oxides) before metal enters the part.
Heat Management: Regulate cooling rates to reduce tears, distortion, or other failures.
Trees:
Allow multiple wax patterns to be attached to a central gating system.
Enable batch production (multiple parts poured in one go), increasing production efficiency and reducing turnaround times.
Uniformity: Ensures consistent metal temperature and flow to all parts. Parts are placed to minimize gas entrapment.
Venting: Trees are channels for air/gas to escape during pouring rather than causing bubbling, impurities, or other part failures.

A wax pattern being affixed to a tree and gate system.
What is the Difference between Vacuum melting and Air melting?
Air melt and vacuum melt are two common methods for melting alloys. The primary differences between the two are the environment in which pouring occurs and the application of the alloy.
Air Melt: Happens in open-air, ambient environments via induction melting, electric arc melting, or gas-fired crucibles. Oxygen and Nitrogen (gases in our atmosphere) will be present in these pours. Air melting is typically cheaper and a great option for non-reactive metals (i.e. metals that will not react with oxygen or nitrogen).
Vacuum Melt: Happens in a vacuum-sealed chamber where no ambient elements will impact pouring. This is done via vacuum induction melting (VIM) or vacuum arc remelting (VAR). Vacuum melting is ideal for reactive metals, or alloys that require the highest purity (no inclusions from the ambient atmosphere).
Wrap Up:
We’ve now explored nearly every step of the precision casting process from tooling to metal pouring. In an upcoming article, we’ll conclude this series by covering shell removal and other finishing operations.
Why Choose IPC Foundry Group?
With 45+ years of expertise and a production capacity exceeding 2 million pounds annually, IPC serves 350+ businesses across the U.S., Canada, and around the globe. Our precision casting solutions are designed to reduce costs, accelerate timelines, and eliminate quality issues—helping you stay competitive.
Ready to kickstart your next production run?